74-77Camaro.com
My '75 Project
Technical
Home of the Red Headed Stepchildren of the 2nd gen Camaros!
'75 Suspension
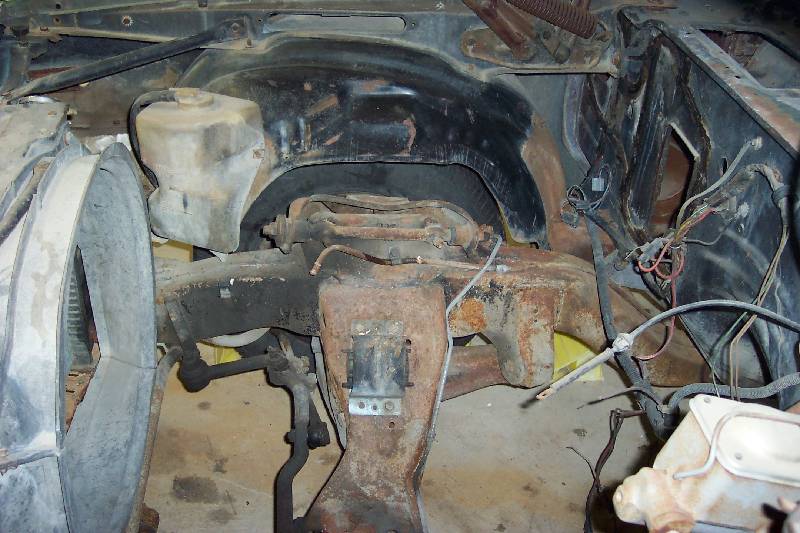

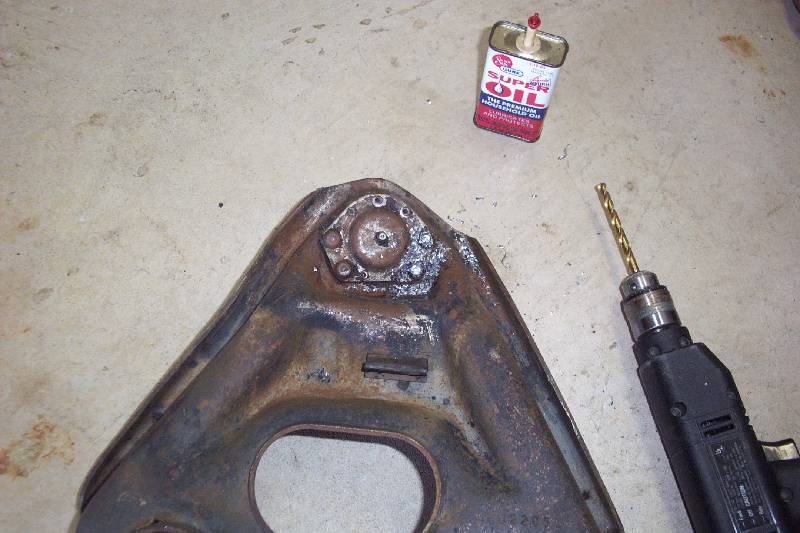
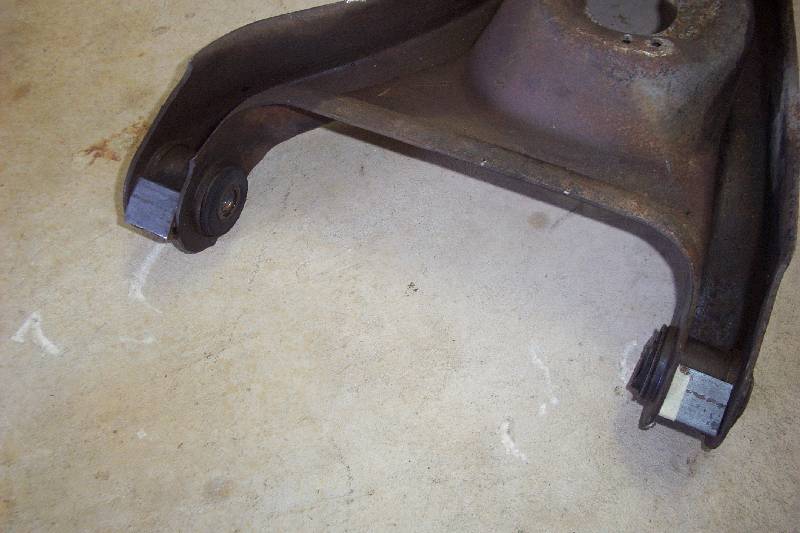
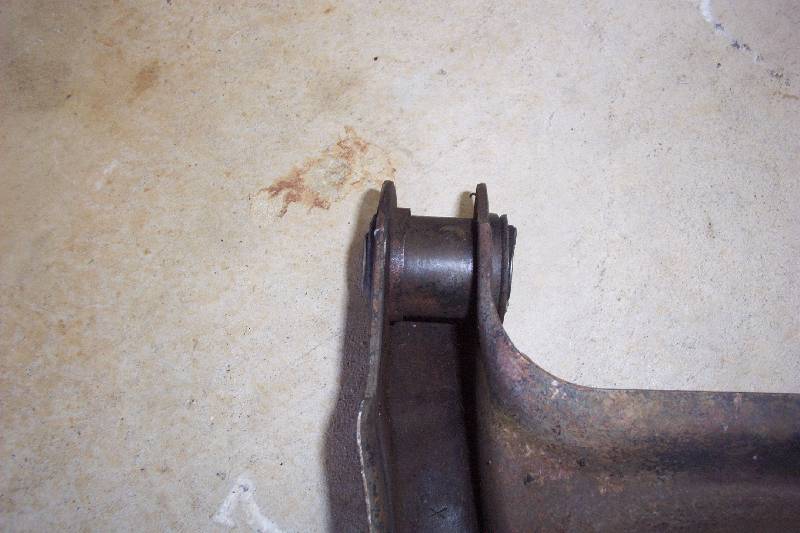
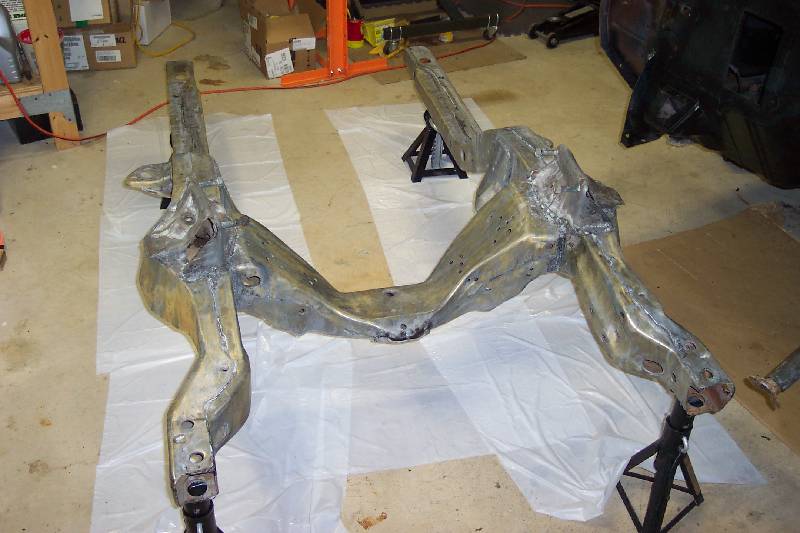
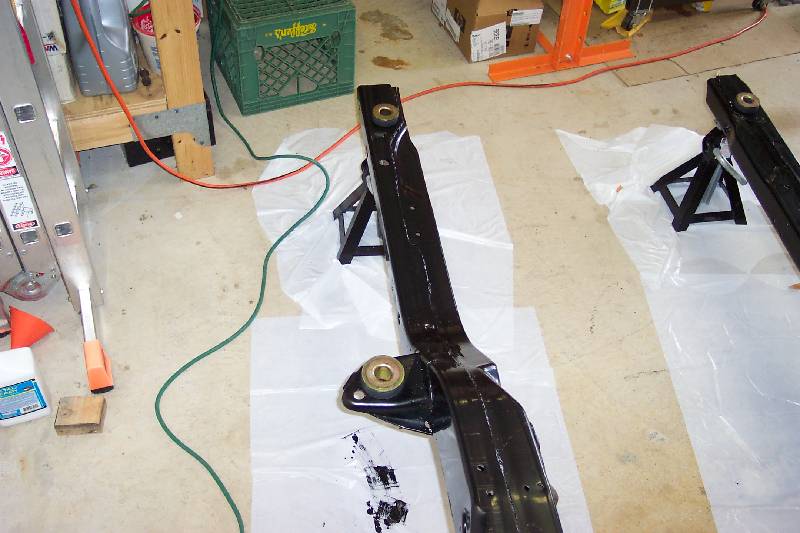
Some before pics of the front suspension. Not much rust but alot of dirt and grease.
There are alot of articles out there about rebuilding your front end; one good one called "Camaro Suspension Session" in a book called 'Camaro Restoration Tips & Techniques'. I'm not going to try to detail out how to rebuild your suspension, but give some tips and overview.
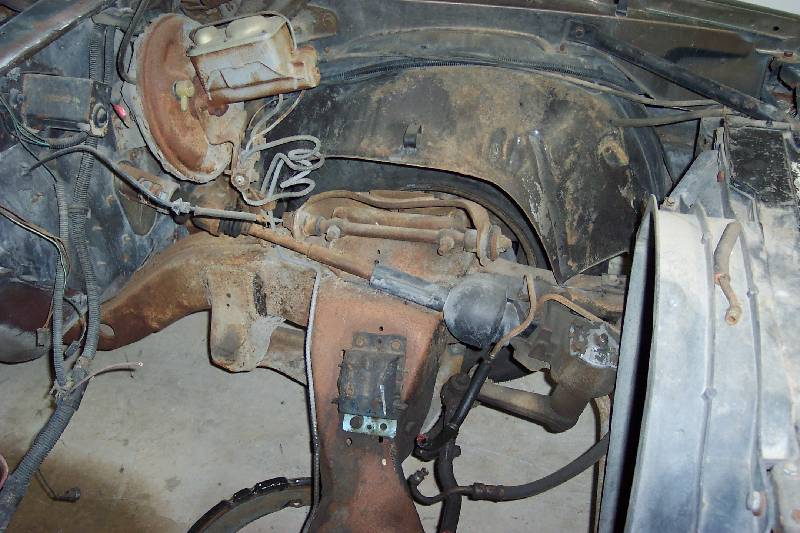
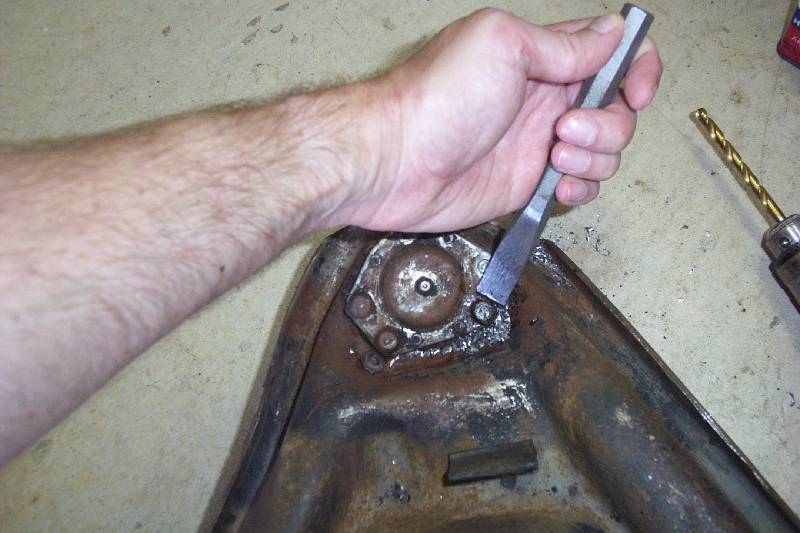
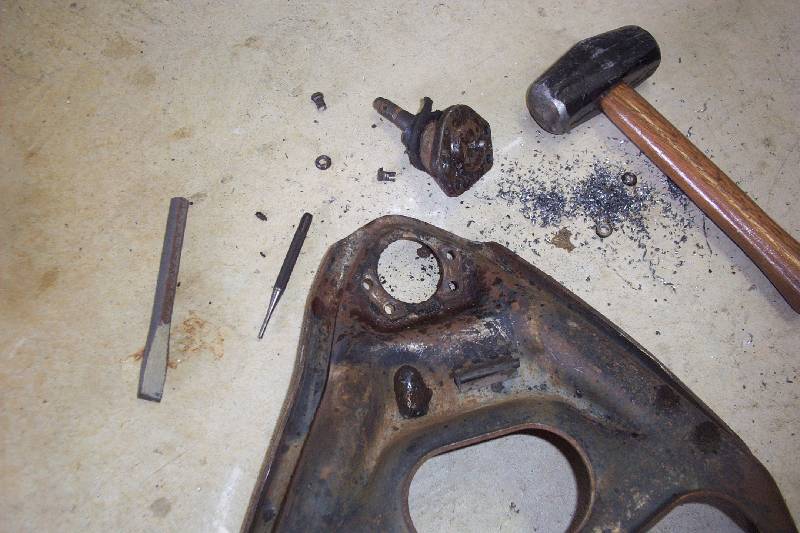
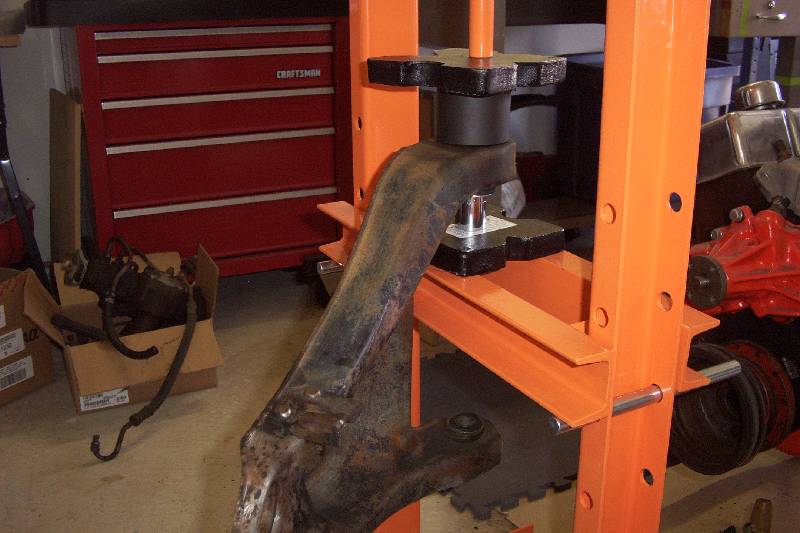
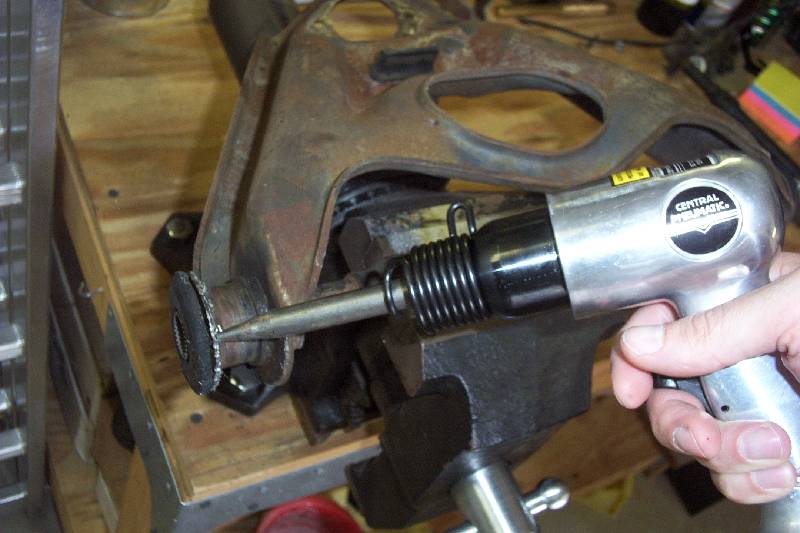
The first three pics above are removing the upper ball joint. Just take a drill, drill out the rivit heads, then take a hammer and chisel and knock what's left of the rivit head off. No big deal. One tip for pressing bushings in or out of the arms is this - Cut a length of angle iron to support the open side around the bushing. This will prevent the A arms from bending and deforming under the pressure of removing the bushing. That is what the fourth and fifth pictures above show.

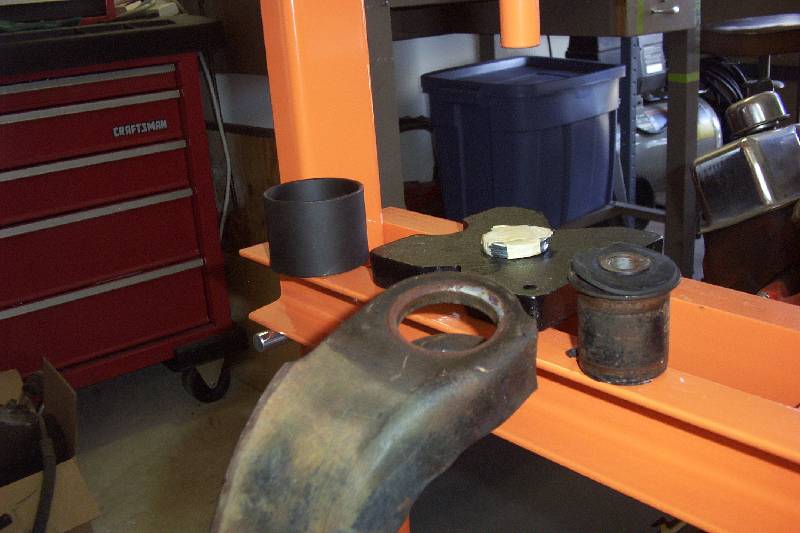
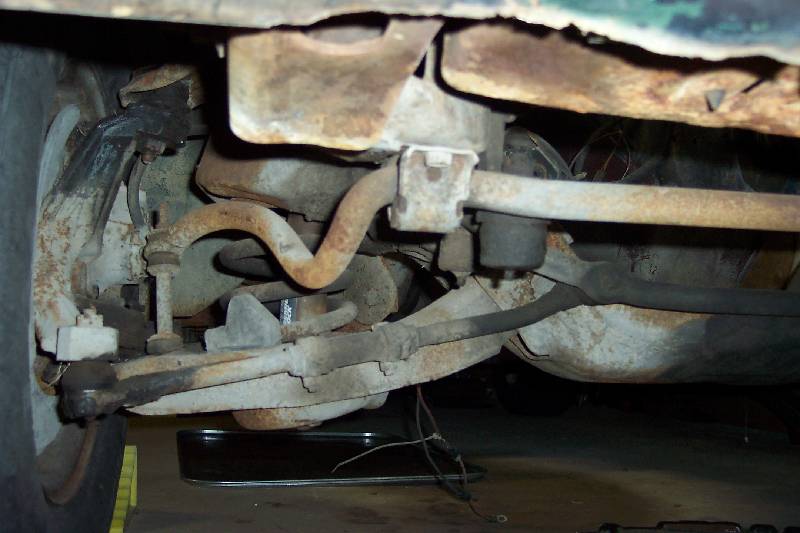
The first pic above shows the factory flare (on the right hand side) on the lower control arm bushings. I took a drift and a hammer and knocked the flange back down as I went around the bushing. Now the bushing can be removed. The second, third and fourth pics show the basic idea of pressing out the bushings. I used a 12 ton hydraulic press that I purchased from Harbour Freight. They run about $100 - $125. It really made the job alot easier. I also rented from Pep Boys a ball joint press. Not for the giant C clamp press, but for all of the handy round pieces of tubing adapters in it. Get a press that has the 4x4 adapters, as there are more of them in it.
Use a socket or a stack of washers that are slightly smaller than the bushing. Place an adapter bigger than the bushing on the other side, and place an Arbor plate on top of it. Make sure your angle iron fits snugly and is supporting the open side of the arm flange. A few strokes on the jack and BANG the bushing will pop out. To install, just repeat the process in reverse.
The fifth picture deals with removing the bushings from the upper control arms. The trick to this is that one of the bushings has small shoulders that prevent it from being pressed all the way against the arm. This will give you enough space to knock the bushing out. Clamp the arm shaft in a vise. I used a cheap pnumatic hammer from Harbour Freight to work around the edge of the bushing, driving it out. You can then press the shaft and the bushing out of the other side.
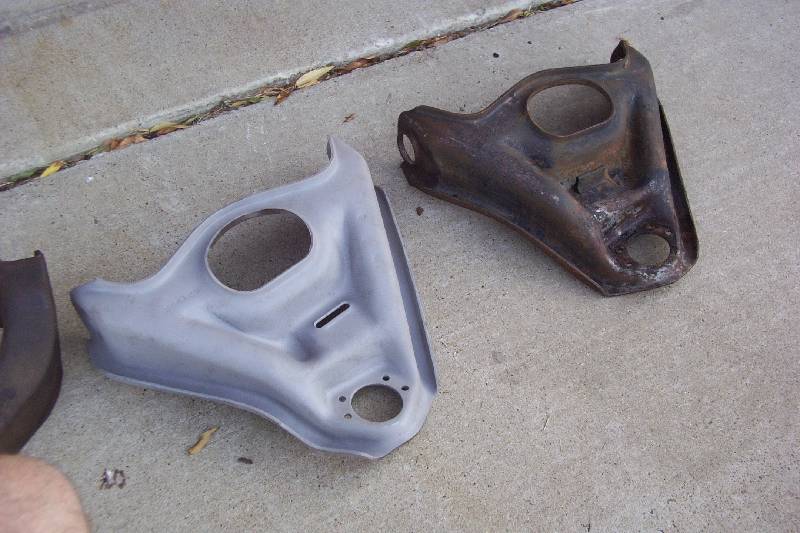
I cleaned the arms prior to pressing out the bushings with Simple Green and a wire hand brush. The first pic above shows such an arm on the right. The left arm was sandblasted in my cabinet with aluminum oxide. I then painted them with POR-15 using a foam brush.
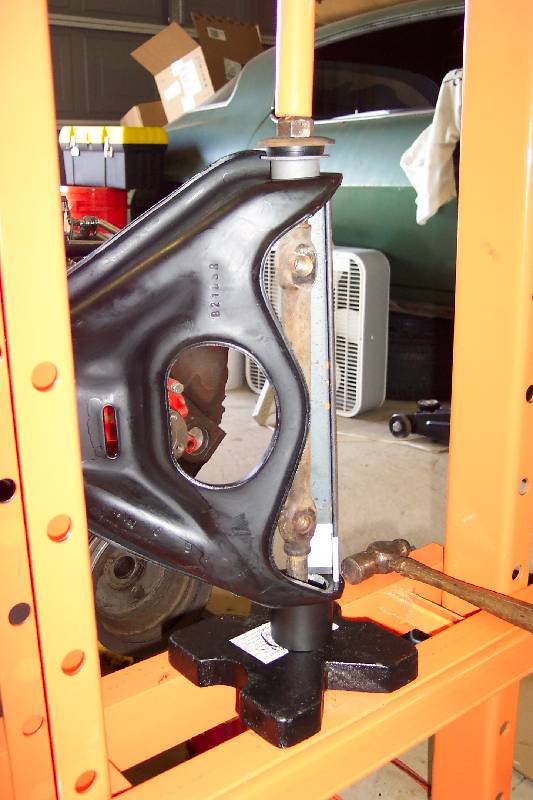
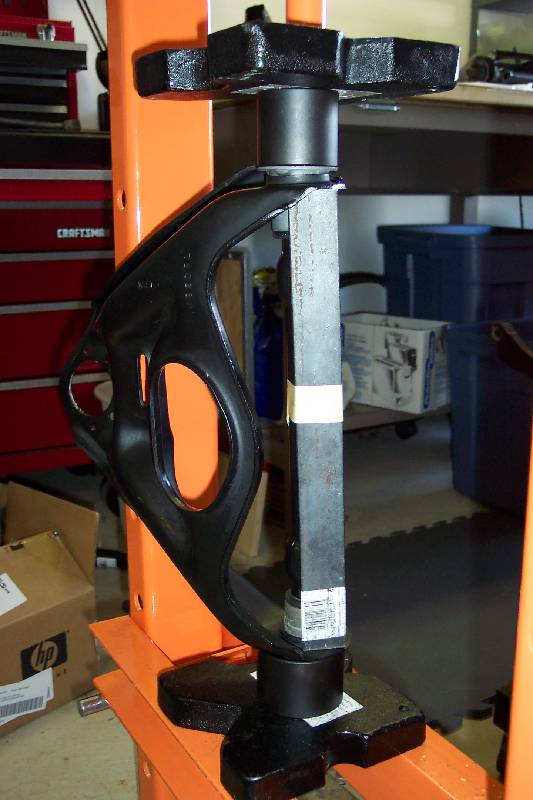
The second and third pics show assembling the upper control arms. The second pic shows pressing the non-shouldered bushing in. Note the piece of angle iron preventing the press from bending the arm. The third pic shows the seating of the shouldered bushing on the opposite side.
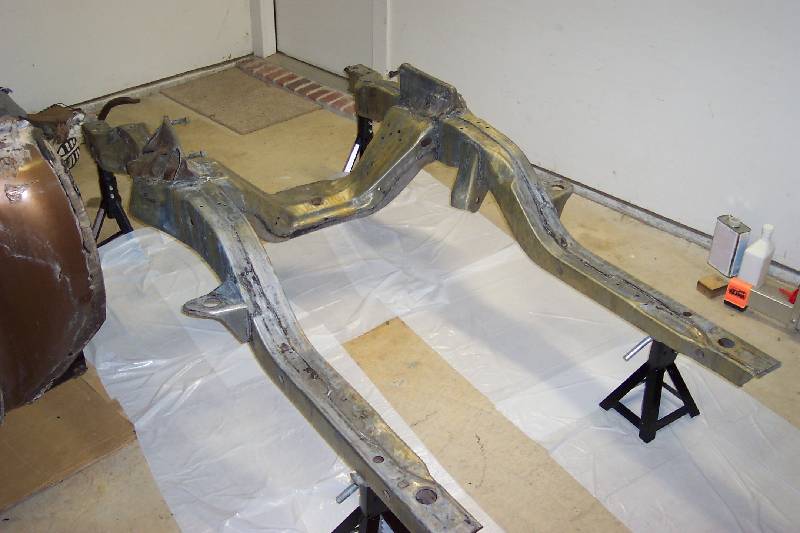
Pics four and five show the subframe after I ground all of the light rust and dirt off with an open fiber disk from Home Depot in an electric drill. I have also applied a zinc prep wash prior to applying the POR-15. Note the plastic trash bags to keep any drips off the floor. POR does NOT COME OFF or you or the concrete easily. Keep this in mind!
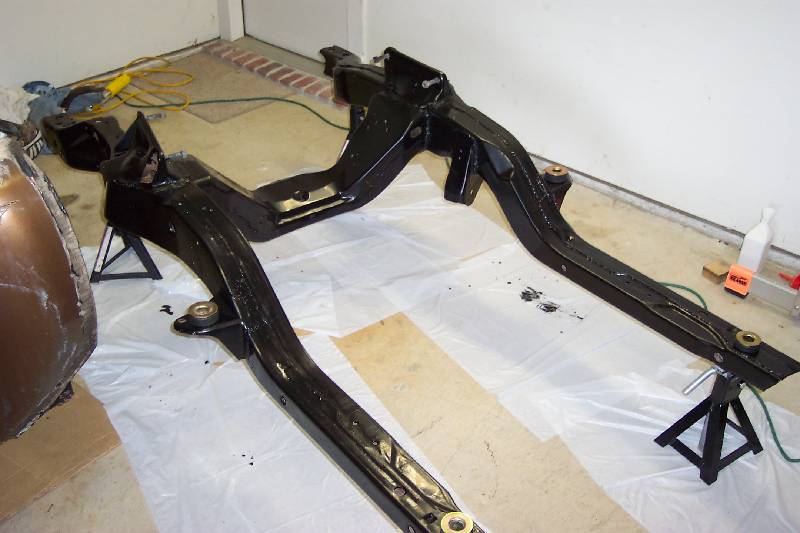

The first three pics show the subframe after being painted with POR and drying overnight. I removed the subframe, cleaned it, painted it, and reinstalled it in one weekend by myself. It's work but can be done. You can also see the black Energy Suspension body bushings set in place. Even if you don't rebuild the front suspension, you ought to replace your original subframe bushings. They are SHOT. Even if you think they look okay, they aren't. Inside the bushings the bolts are rusting and they have crushed with age. This is what holds the front half of your car onto the back half. REPLACE the bushings and bolts! Hint: If you can, once or twice a week for about four weeks prior to the bushing removal, soak those things in PB Blaster. This will greatly help in removing these bolts without breaking the bolts or the caged nuts up in the body.
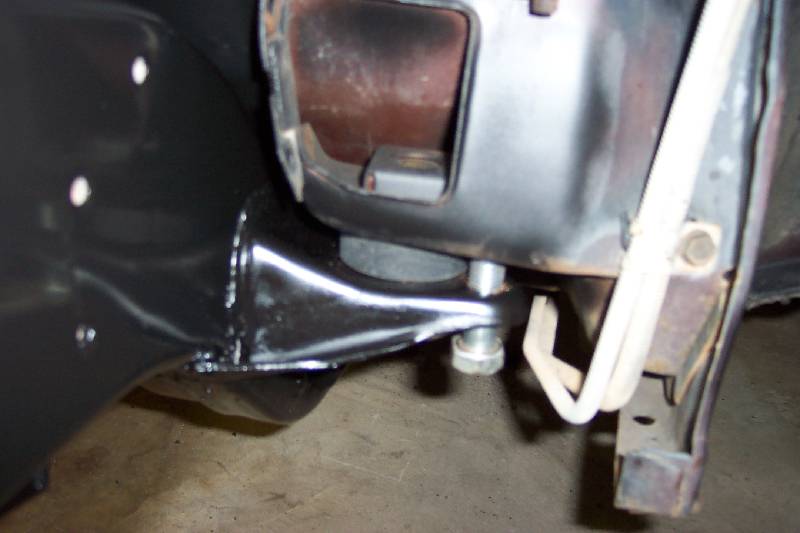
The fourth pic shows the middle mount, located just under the brake booster. Here you can see a bolt through the aligning hole in the subframe. It is a very tight fit through the subframe, and it had to be threaded into the body. On the passenger side, there is a similar hole in the subframe , and a slot in the body. Thread a bolt through the subframe and into the slot. Again, this will be a tight fit. This locates your subframe square with the body, just like at the factory. Now install the four rear subframe bolts evenly and torque to 85 ft-lbs, gradually in a criss cross pattern. Remove the locating bolts.
The fifth pic is just a shot of the firewall cleaned up and painted with Eastwood Underhood Black.
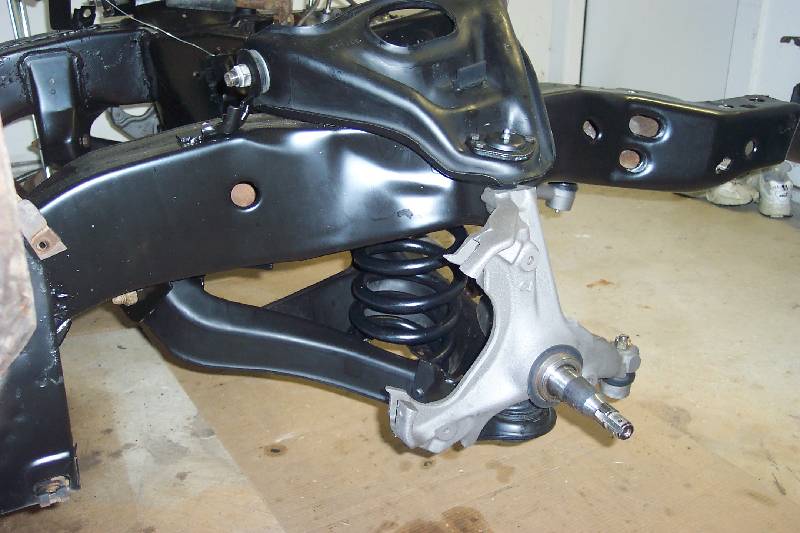
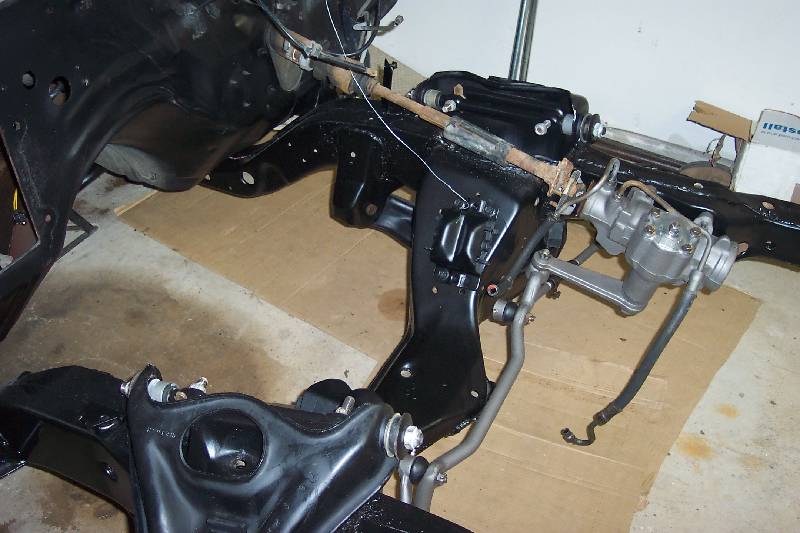

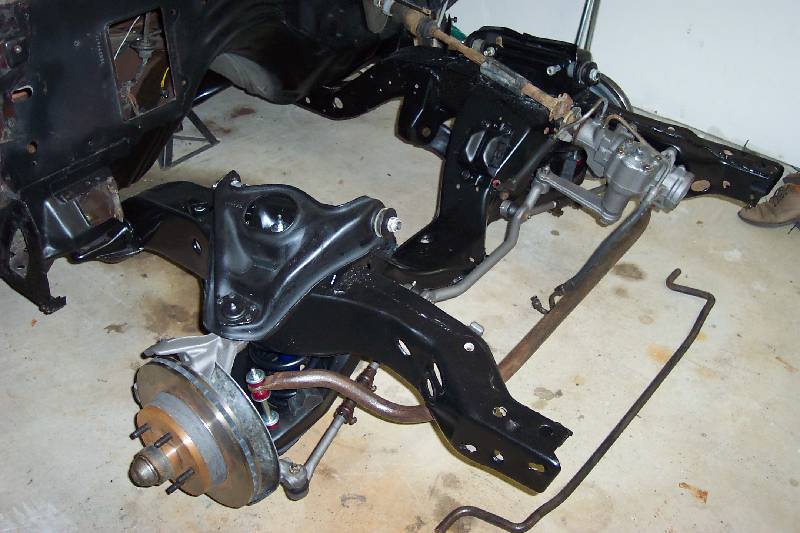
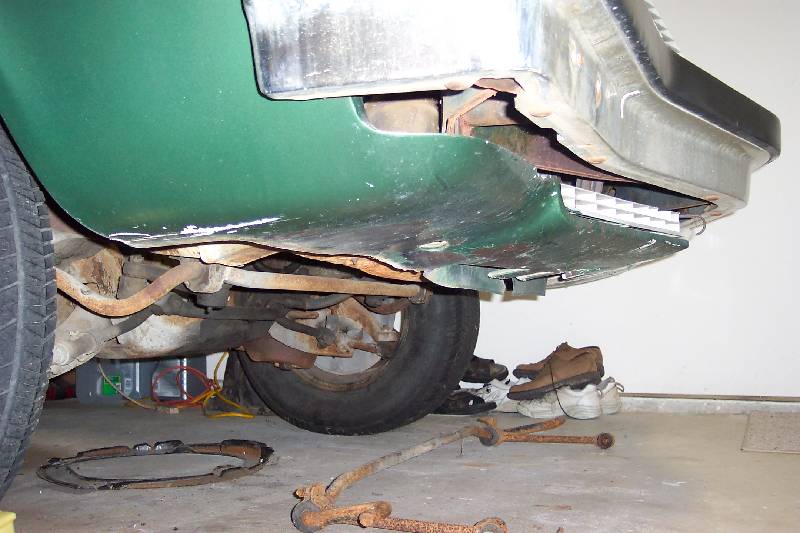
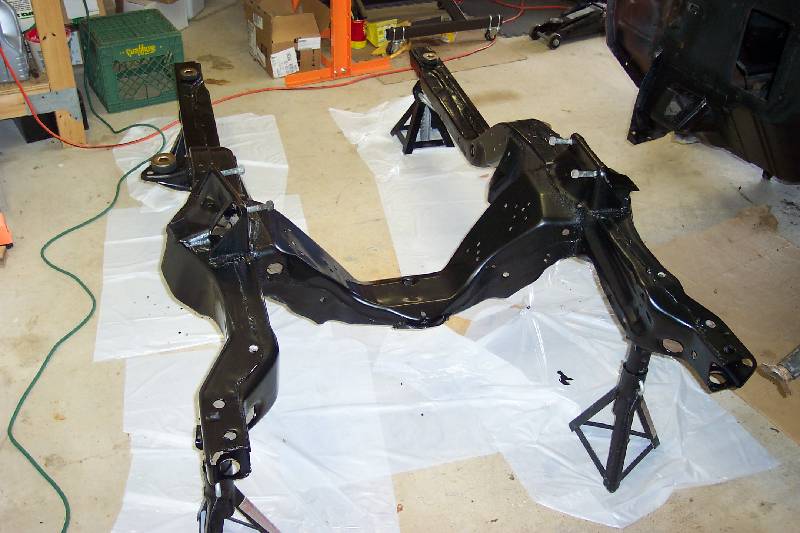
This first pic shows the suspension reassembled with '79 Deville (B-Body) spindles and Moog 5610 (421 lb) springs. All the front suspension parts were replaced - the bushings, balljoints, centerlink, draglink, inner and outer tie rod ends and adjusters - with new Moog parts. New Timkin bearings were used. This first shot also shows the real lack of difference in how you choose to clean your parts, and how well the POR covers. The subframe was ground clean with fiber wheels, the upper arm was blasted in a cabinet, and the lower arm was blasted outside with Black Diamond slag and a siphon gun out of a 5 gallon bucket.
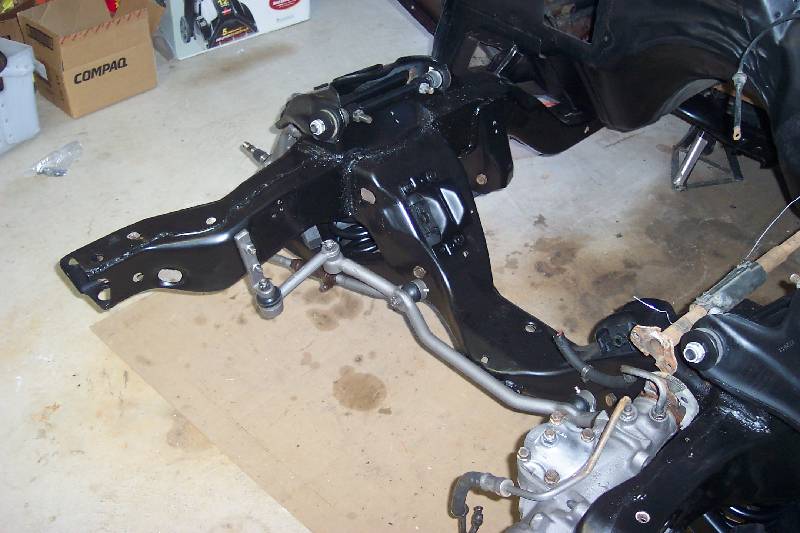
The second and third shots show the other new parts. The new linkages were painted with Eastwood Cast Iron Grey. The steering box was cleaned with Simple Green and painted also. Pic number four is the drivers side. Fifth pic shows the 12" 1LE rotors mounted, along with the 1.25" WS6 front stabilizer bar. On the floor is the 13/16" rear WS6 bar. Energy Suspension endlink bushings and greaseable swaybar mounts were used.